Launching a token on Eclipse, the Ethereum Layer-2 that leverages the Solana Virtual Machine (SVM), is quickly becoming a top choice for developers seeking high throughput, low fees, and cross-ecosystem liquidity. If you’re an Ethereum developer looking to deploy your own token on Eclipse, this step-by-step guide is tailored to current tools and requirements. We’ll walk through every critical stage, referencing the exact workflow you’ll need for a successful launch in 2025.
Why Choose Eclipse for Your Token Launch?
Eclipse stands out by combining Ethereum’s security with Solana’s performance. As a Layer-2 rollup running the Solana VM on Ethereum infrastructure, it enables you to deploy Solana-style dApps while tapping into Ethereum’s vast liquidity. The recent mainnet launch and $ES airdrop have drawn significant developer attention, making Eclipse one of the most exciting venues for new tokens in 2025.
Step 1: Set Up Development Environment and Wallets
Your first step is preparing your development environment:
- Node. js (16.15 and ): Required for running deployment scripts.
- TypeScript and amp; ts-node: Essential for TypeScript-based tooling.
- Solana CLI: For SVM interactions and contract deployment.
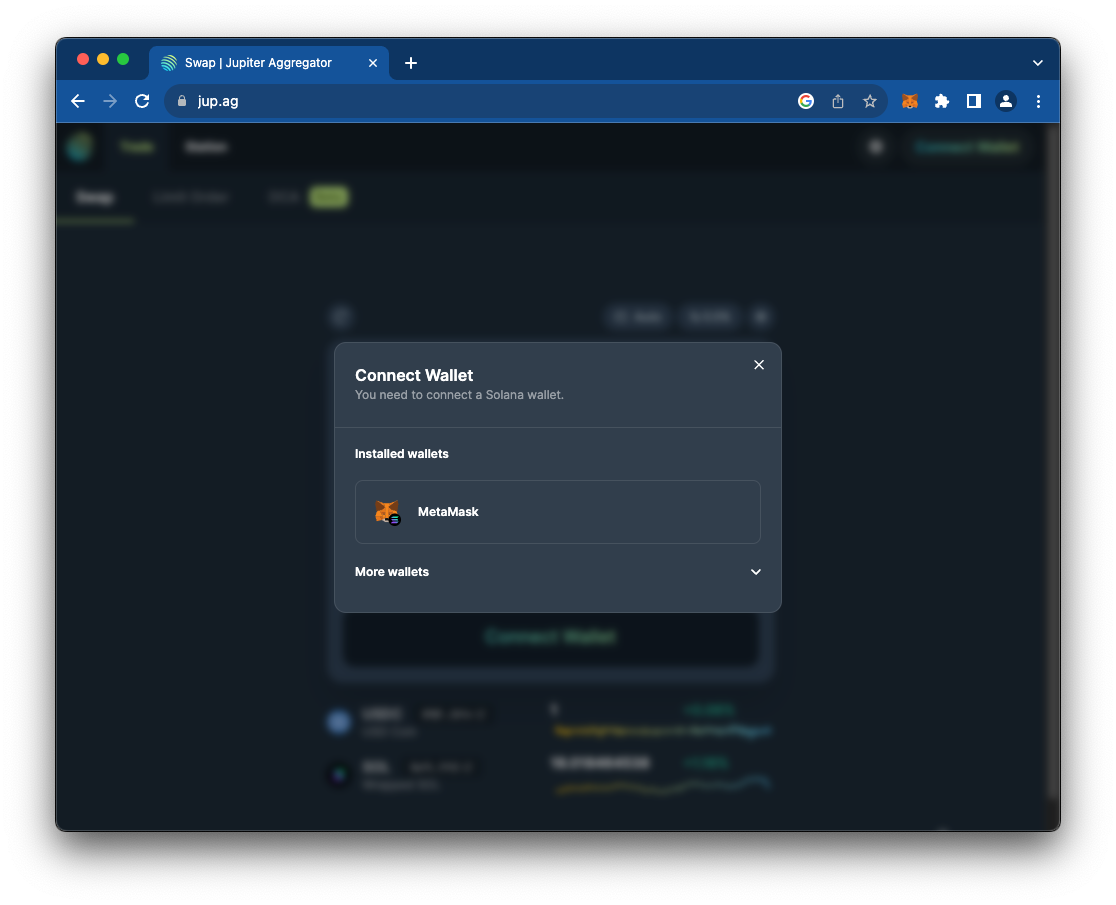
- MetaMask with Snaps: Use MetaMask or another EVM wallet; Snaps support is now live for Eclipse access (source).
This setup ensures compatibility with both EVM and SVM tooling. MetaMask Snaps allow seamless connection to Eclipse’s hybrid architecture, letting you manage assets across both ecosystems without friction.
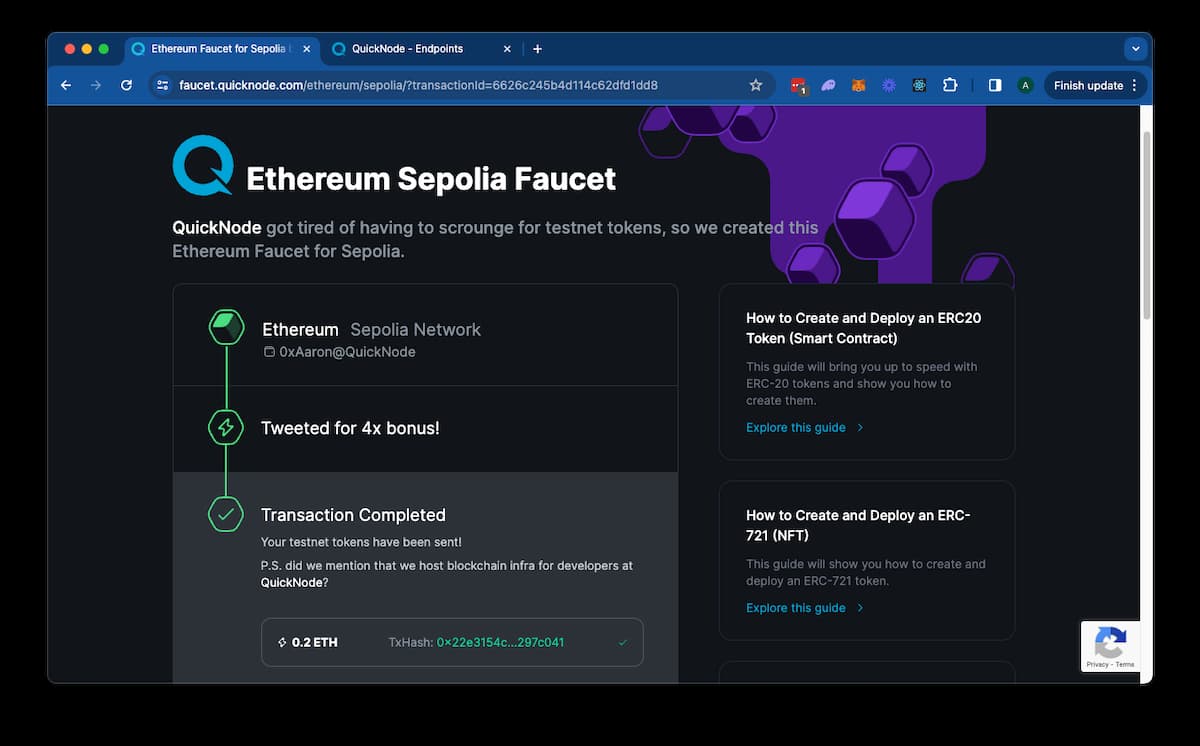
Step 2: Bridge Sepolia ETH to Eclipse Testnet for Gas Fees
You’ll need Sepolia ETH as gas on the Eclipse Testnet before deploying contracts. Use the official bridge to transfer ETH from Sepolia Testnet to your Eclipse address. This step mirrors mainnet processes but uses test assets, vital for risk-free testing before real deployments.
- Obtain Sepolia ETH: Acquire from a faucet if needed.
- Bridge via Official Portal: Follow prompts to connect your EVM wallet and select L2 as your destination chain (see step-by-step guide).
This process ensures you have sufficient gas to cover all contract interactions during development and testing phases on Eclipse.
Step 3: Write and Audit Your Token Smart Contract (Solidity/Solana VM Compatible)
The unique aspect of launching on Eclipse is its support for both Solidity (EVM) and Rust (SVM) smart contracts. Most Ethereum developers will start with Solidity ERC-20 templates but should ensure compatibility with SVM standards if planning advanced features or cross-chain interoperability.
- Create Token Contract: Use familiar ERC-20 templates or adapt existing codebases as needed.
- Audit Carefully: Given the hybrid environment, thorough auditing is essential, especially if using new features or integrating Solana-native logic.
If you want a streamlined experience, check out open-source deployment scripts like those in the Eclipse Token Deployment Guide, which provide templates and automation for both mainnet beta and testnet launches.
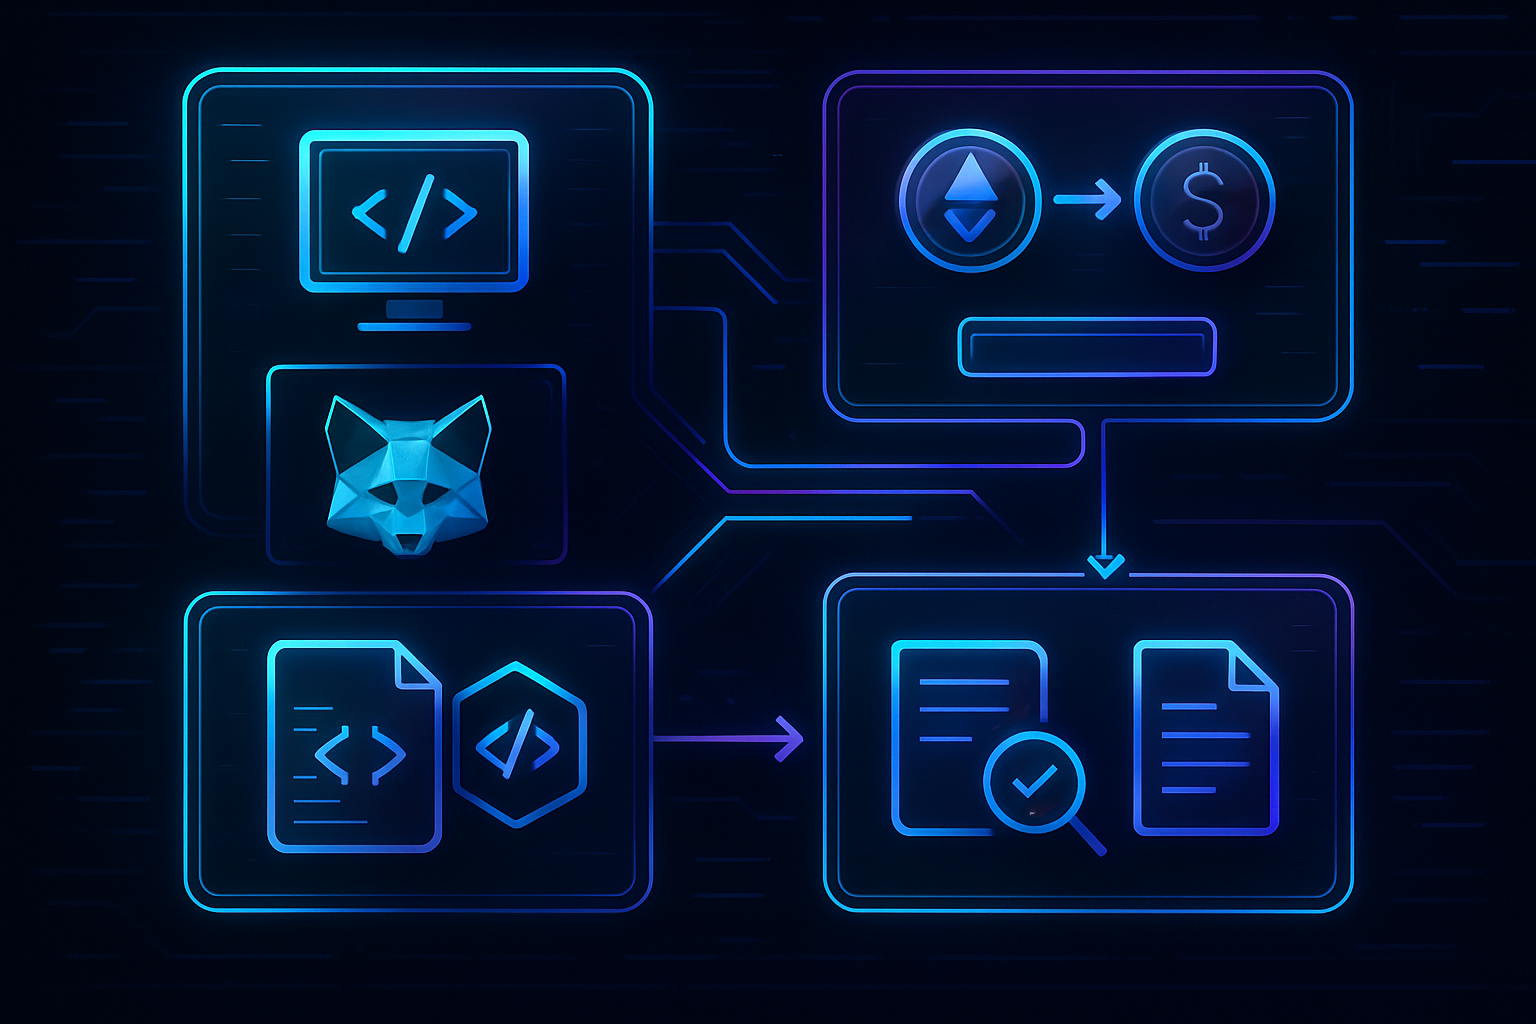
Steps to Launch an ERC-20 Token on Eclipse L2
- Set Up Development Environment and Wallets (MetaMask with Snaps): Install Node.js (v16.15+), TypeScript, ts-node, and the Solana CLI. Set up MetaMask with Snaps for Eclipse L2 compatibility, enabling you to interact with both EVM and SVM environments.
- Bridge Sepolia ETH to Eclipse Testnet for Gas Fees: Use the official Eclipse bridge to transfer Sepolia ETH to the Eclipse Testnet. This ETH will be required to pay for transaction fees on the network.

- Write and Audit Your Token Smart Contract (Solidity/Solana VM Compatible): Develop your ERC-20 compatible smart contract using Solidity or ensure SVM compatibility. Conduct a thorough audit using established tools like Slither or MythX to identify vulnerabilities.

- Deploy Token Contract on Eclipse Layer-2 via Supported Tools: Use deployment scripts or guides such as the Eclipse Token Deployment Guide to deploy your token contract on Eclipse Mainnet Beta or Testnet.

- Verify Token Deployment and Test Functionality on Eclipse Explorer: Confirm your token contract is live and functional using the Eclipse Explorer. Test transfers, balances, and other core functions to ensure proper deployment.

- Announce Launch, Distribute Tokens, and Monitor Network Activity: Publicly announce your token launch on platforms like Twitter and Discord. Distribute tokens as planned and use analytics tools to monitor network activity and user engagement.
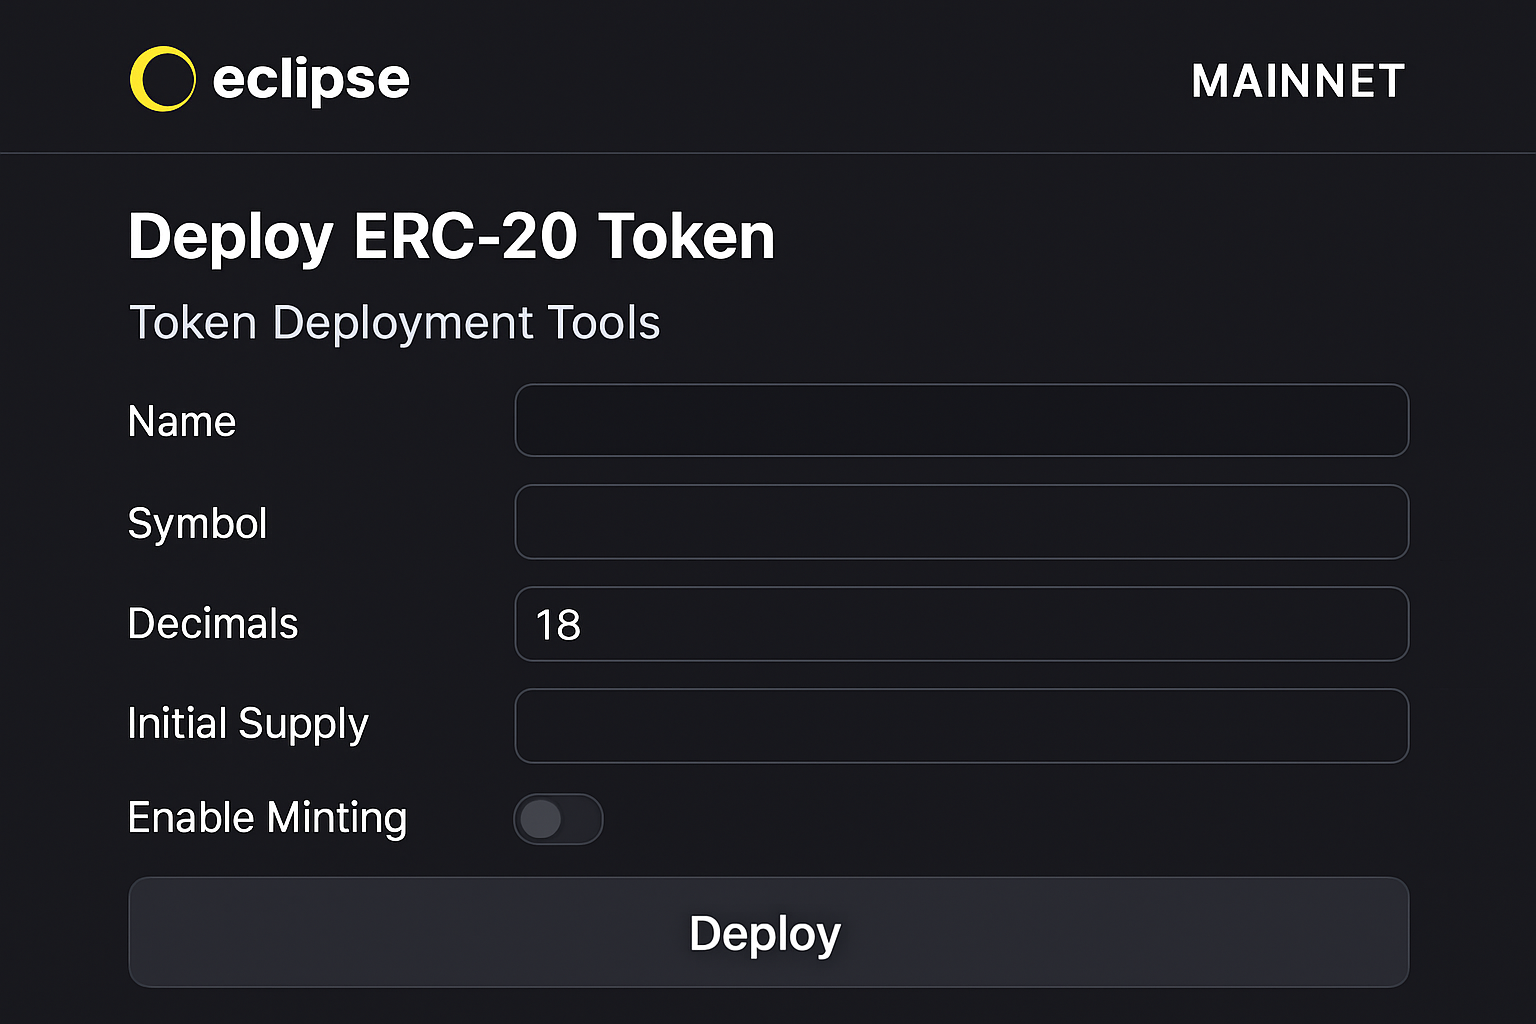
Step 4: Deploy Token Contract on Eclipse Layer-2 via Supported Tools
Once your contract is ready and audited, it’s time to deploy on Eclipse. The process is familiar for Ethereum developers but with a few Eclipse-specific requirements:
- Deployment Scripts: Use the deployment scripts from the Eclipse Token Deployment Guide or similar open-source repositories. These tools automate wallet setup, metadata generation, and contract deployment for both mainnet and testnet.
- SVM Compatibility: If leveraging Solana VM features, ensure your deployment tool supports SVM-compatible contracts. Some tools allow for one-click deployments with hybrid support.
- Network Selection: Double-check you’re connected to the correct network (Eclipse Mainnet or Testnet) in MetaMask Snaps or your preferred wallet before proceeding.
This step finalizes your token’s presence on the Eclipse Layer-2. The transaction will consume gas paid in ETH bridged to Eclipse, so monitor balances closely during this phase.
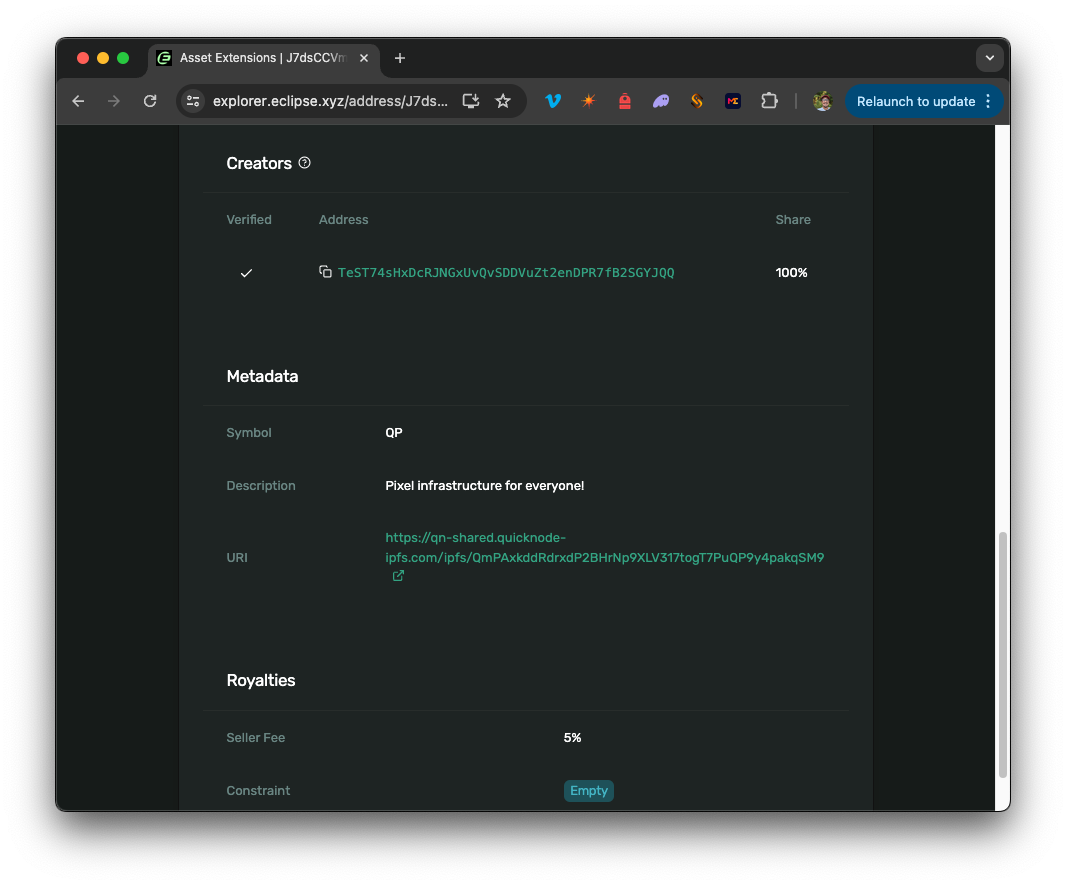
Step 5: Verify Token Deployment and Test Functionality on Eclipse Explorer
After deploying, you need to confirm that everything works as intended. Head to the official Eclipse Explorer to:
- Verify Contract Address: Confirm that your token contract appears under your account with the correct metadata.
- Test Transfers: Execute a few test transfers between wallets to ensure basic ERC-20 (or SVM equivalent) functions operate smoothly.
- Review Events and Logs: Check emitted events and logs for accuracy, especially important if you’ve implemented custom logic or cross-chain features.
This verification step helps catch any issues early, before public distribution or listing on DEXes. If problems arise, re-audit your code and repeat test deployments until satisfied with stability and security.
Step 6: Announce Launch, Distribute Tokens, and Monitor Network Activity
Your token is now live on Eclipse! The final phase focuses on launch strategy and ongoing management:
- Announce Launch: Share details across social channels (Twitter/X, Discord, Telegram) with links to the verified contract address on Eclipse Explorer.
- Airdrop or Distribution: If you’re running an airdrop campaign like $ES did (see guide), leverage automated distribution scripts or manual transfers as appropriate. Transparency here builds trust with early users.
- Monitor Network Activity: Keep an eye on transfer volumes, price discovery if listed on DEXes, and user feedback. Use analytics dashboards where available to track adoption metrics over time.
The post-launch period is critical for building momentum. Engage with community questions promptly and be prepared to iterate if unforeseen issues are discovered during initial trading activity.
Post-Launch Best Practices for Eclipse Tokens
- Set Up Development Environment and Wallets (MetaMask with Snaps): Ensure your development environment is secure and up-to-date. MetaMask with Snaps enables seamless interaction with the Eclipse Layer-2, supporting both EVM and Solana SVM functionalities.
- Bridge Sepolia ETH to Eclipse Testnet for Gas Fees: Use the official Eclipse bridge to transfer Sepolia ETH to the Eclipse Testnet. This step is essential for covering transaction and deployment costs on the network.
- Write and Audit Your Token Smart Contract (Solidity/Solana VM Compatible): Develop your token contract using Solidity or SVM-compatible languages. Prioritize a comprehensive audit to identify vulnerabilities and ensure compliance with best practices.
- Deploy Token Contract on Eclipse Layer-2 via Supported Tools: Utilize deployment tools such as the Eclipse Token Deployment Guide for efficient contract deployment on Eclipse Mainnet or Testnet.
- Verify Token Deployment and Test Functionality on Eclipse Explorer: Confirm your token's presence and correct functionality using the Eclipse Explorer. Test transfers and contract interactions to ensure reliability.
- Announce Launch, Distribute Tokens, and Monitor Network Activity: Publicly announce your token's launch, distribute tokens to eligible users, and monitor on-chain activity using analytics tools to track adoption and performance.
Frequently Asked Questions About Launching Tokens on Eclipse L2
Final Thoughts: Why Modular Rollups Like Eclipse Matter in 2025
The rise of modular rollups such as Eclipse signals a shift toward highly performant yet composable blockchain environments. By integrating Solana’s execution speed with Ethereum’s liquidity base, projects can offer users lower fees without sacrificing security or developer familiarity. Whether you’re launching a DeFi protocol token or experimenting with new governance models, following these precise steps ensures your project gets off the ground efficiently, and positions it at the cutting edge of Web3 innovation.


No comments yet. Be the first to share your thoughts!